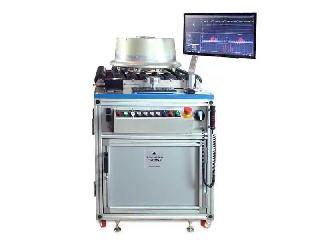
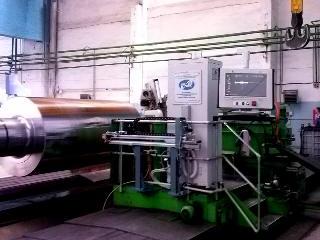
The SNK KB–13 is an integrated, high throughput automated inspection system. It is intended for ultrasonic quality control of machined and finished railway wheels and rims with the following parameters:
- Wheel/rim weight — from 200 kg to 1300 kg.
- Wheel/rim diameter — from 700 mm to 1350 mm.
- Rim width — from 80 mm to 160 mm.
- Rim thickness — from 35 mm to 150 mm.
Key Features:
- code compliance inspection (AAR M 107/208, EN 13262, UIC 810-1, ISO 5948);
- inspecting the tread of a rail wheel in axial and radial directions (minimal defect diameter – 1 mm; minimal depth of the defect – 5 mm);
- inspecting the wheel hub in axial direction from opposite sides (minimal defect diameter – 3 mm; minimal depth of the defect – 5 mm);
- fast scan speed;
- quick and easy evaluation of defect parameters (defect depth, approximate coordinate, amplitude, equivalent defect size, equivalent area in millimeters);
- acoustic and visual alarms;
- Defect Table, A, B and C-scan data processing;
- saving the inspection data to the System memory as well as data transfer to the server;
- comprehensive electronic and paper inspection reports in xls or pdf formats;
- possibility to use pre-stored test configurations with different sets of probes, coordinates, etc.;
- marking acceptable products and defects with paint in order to verify the defect further in manual mode.
The dedicated software manages the mechanical units of the System as well as reading, processing, and recording test results, thus enhancing detectability and reducing the impact of the human factor.
The System design ensures the operator’s safety featuring automatic blocking, alarm, and emergency shutdown.
Specifications
- The SNK KB – 13 System test throughput – from 10 wheels/rims per hour.
- The SNK KB – 13 System readjustment time and preparation for another wheel/rim type scanning at a given software configuration for a specific assortment is no more than 10 min; for another assortment when the software is not configured – no more than 120 min.
- Generator sounding pulse amplitude is no less than 180 V at the pulse duration (60 ± 20) ns and the duration of the leading edge is no more than 20 ns.
- Operating frequency of the probe – 4-5 MHz.
- Number of ultrasonic channels – 6.
- Maximum PRF – 2000 Hz.
- Channel sensitivity (Signal to noise ratio) – 16 dB.
- Involute measurement step – can be adjusted within 1 to 8 mm.
- Absolute error of the defect depth – no more than ±3 mm.
- Absolute error of the relative position of the defect along the scanning path – no more than ± 15 mm.


